Article Writing Workflow & Production Guide
Last updated: October 13, 2026
Quick Answer
The best article writing workflow is usually a 5-to-7-step process that gets a clear brief into publishable copy without letting research, drafting, and approvals drag on forever. If I had to reduce the whole job to one sentence, it would be this: decide the article’s purpose first, build the outline second, draft fast in one pass, then edit for structure, proof, and fit before anything goes live.
In Article Writing Workflow & Production — The Complete Guide, the practical goal is to move from brief to publishable article with as few avoidable handoffs as possible.
Key Takeaways

- The workflow should match the article type, team size, and topic risk.
- Start the outline from the reader’s decision point, not a random topic list.
- Volume, risk, and approval layers change the process.
- A durable production system gives each stage one owner, one output, and one handoff.
What Actually Determines the Right Workflow?
The right workflow is determined by the kind of article you need, the number of people touching it, and how much risk sits behind the topic. If you are writing a blog post for a small brand, a 5-step workflow can be enough. If you are handling a 2,500-word product comparison for a regulated niche, the process needs more checkpoints, more source control, and a slower approval lane.
The biggest mistake I see is treating every article as if it needs the same production path; if the topic is legal, medical, or financial, consult a qualified professional and follow the relevant guidance. A listicle for a SaaS homepage blog does not need the same workflow as a white-paper-style article on healthcare software compliance. The first can move from brief to draft in a day. The second may need subject-matter review, legal review, and a final pass for claims. That difference changes everything, and the right workflow should reflect it.
Here is the simplest way to choose the right path:
| Situation | Best Path | Why Other Options Fail |
|---|---|---|
| One writer, one editor, low-risk topic | Brief → outline → draft → edit → publish | Extra approval layers slow the work without adding much value |
| Multiple stakeholders, B2B software topic | Brief → source pack → outline sign-off → draft → SME review → edit → publish | Skipping sign-off creates rework when positioning changes late |
| Technical or regulated topic | Brief → research memo → structured draft → fact-check → expert review → final edit | “Write first, verify later” can create expensive corrections |
| Content machine with weekly output | Templated workflow + checklist + CMS-ready formatting | Free-form process causes inconsistency and missed deadlines |
If you are in a high-volume content team, I would choose a template-led workflow over a blank-page process every time. If you are a solo writer on a complex article, I would slow down the front end and protect the outline. The real question is not “What is the perfect workflow?” It is “Where will this article break if I rush it?”
A practical article workflow usually has 5 phases:
- Define the job. Write the reader’s problem in one sentence. For example: “This article must help a marketing manager choose a workflow for producing 12 blog posts a month.”
- Gather only what you need. Pull the product docs, style guide, competitor examples, and any standards or policy docs that change the claims.
- Outline the argument. Decide the order of sections before drafting. For most articles, 6 to 8 sections is enough.
- Draft in one pass. Write to the outline without stopping for perfect wording. A clean first draft beats a polished opening that goes nowhere.
- Edit in layers. Check structure first, then clarity, then facts, then grammar, then formatting for the CMS.
- Publish with a final QC pass. Read the article as a searcher would: do the headings, examples, and conclusion actually solve the original problem?
The trade-off is simple: tighter workflow means fewer mistakes, but more process can slow output. I would not put a 7-step approval chain on a general lifestyle article. I also would not trust a loose “just write it” process on a software comparison page where the wrong claim can mislead a buyer.
Therefore, if your article would cause embarrassment if a single claim was wrong, you need a heavier workflow; if the risk is low, keep the path short and move faster.
How Do I Turn a Brief Into an Outline That Actually Holds Up?

A strong outline is built from the reader’s decision point, not from a random list of subtopics. If you start with “what should this article cover?” you will get a broad, wandering draft. If you start with “what must the reader decide after reading this?” the outline becomes useful.
For article writing workflow and production, the outline should show the production path the reader can follow. That means each section needs a job: define the project, explain the handoff points, show what changes in different situations, and cover the edge cases that usually break production. I like to think of an outline as a routing plan, not a table of contents.
The fastest way to build one is usually to work backward from the final result. If the finished article needs to help a team produce publishable content, then the outline should answer: what is the brief, who touches the draft, where does it slow down, what tools help, and where should the process change by context?
If you want a dependable outline process, use this sequence:
- Write the one-sentence promise. Example: “This article will show how to move from brief to published article without breaking quality control.”
- Name the reader and the setting. A solo founder, in-house marketer, agency editor, or freelance writer each needs a different workflow.
- List the decision points. Research depth, drafting method, editing order, approval layers, and CMS prep.
- Choose 4 to 6 major sections. Each section should add something the others do not.
- Add the edge cases. Bring in short deadlines, SME bottlenecks, and topics that require fact checking.
- Check for overlap. If two sections say the same thing in different words, merge them.
- Put the hardest decision first. Readers stay when the page answers the part they were worried about immediately.
The most common outline mistake is burying the practical part under background. I would rather see “How to write the draft” before “Why process matters.” In article production, the “why” matters, but the “how” pays the bills.
One benchmark I use for structure quality is simple: if a section cannot be summarized in one sentence without sounding vague, it probably needs to be split, tightened, or cut. A more general checkpoint is the 80/20 idea: if a small share of the sections explains most of the actual work, the outline is probably healthy. If the article still feels thin at 1,500 words, the outline is missing production detail, not polish.
A generic article gets this wrong by giving the same advice to everyone. It says “know your audience” and “write a strong intro” but skips the production choices that decide whether the article ships. That is why I would ask: what breaks first, the draft, the review, or the upload?
Therefore, if your outline still works after swapping the topic title for another subject, it is too generic to be useful.
The 3 Conditions That Change Everything
The workflow changes when volume, risk, and approval complexity change. If any one of those three shifts, the “normal” process may stop working. A 600-word blog post for a small startup can survive a light workflow. A 2,000-word software article with claims, screenshots, and legal review cannot.
The first condition is volume. If you need one article a month, manual coordination is fine. If you need 12 or 20, the process needs templates, assignment rules, naming conventions, and a content calendar. Without that, the work turns into inbox chaos. Even a good writer starts losing time to re-explaining the brief.
The second condition is risk. If the topic includes legal, finance, medical, or product claims, the workflow has to add verification. That does not mean turning the article into a policy document. It means building in a fact-check step and knowing which claims need source support. For software content, that often includes feature availability, integrations, security language, and pricing references. If you are not certain about a claim, do not dress it up. Replace it with a more general, accurate statement.
The third condition is approval complexity. If one editor signs off, the path is short. If three people need to review the article, the workflow needs deadlines, ownership, and a final decision-maker. Otherwise the article stalls in “comments pending” limbo.
Here is a practical way to choose the path:
| Situation | Best Path | Why Other Options Fail |
|---|---|---|
| 1 article, low stakes | Simple draft-and-edit flow | A heavy process adds delay without reducing much risk |
| High output, repetitive format | Template + checklist + scheduling tool | Purely manual production causes inconsistency |
| Claims-heavy software article | Source-first workflow with fact check | Drafting before verification invites rework |
| Multiple reviewers | Staged approvals with one final owner | Shared ownership without a decider creates stalls |
If you are writing for a software buyer, I would not start with screenshots or polished copy. I would start with the claim map: what the article can say, what it must avoid, and what evidence supports each point. Tools like Google Docs for drafting, Airtable for assignment tracking, Notion for briefs, and a CMS like WordPress or Contentful for final formatting can all fit into that setup. The tool matters less than the handoff discipline.
The standard advice is wrong when it treats editing as one step; if the article is legal, medical, or financial, consult a qualified professional and follow the relevant guidance. Editing is usually four separate jobs: structure, language, fact accuracy, and publishing format. If you combine them, important problems hide in the noise. A strong workflow separates them by purpose, even if the same person handles more than one step.
Quick check: if your team ever says “the draft was good, but the final went sideways,” your workflow is missing a condition-based gate.
How Do I Build a Production System That Doesn’t Fall Apart?
A production system holds up when each stage has a clear output, a clear owner, and a clear handoff. If any one of those is fuzzy, the article slips. The point is not to make writing feel bureaucratic; the point is to stop work from bouncing around inside email threads and half-finished docs.
For a dependable article production system, I would use this order: brief, source pack, outline, draft, edit, review, CMS prep, publish. That is not the only order that works, but it is the easiest to keep clean. The source pack comes before drafting when accuracy matters. The CMS prep comes near the end so you do not waste time formatting a draft that may change.
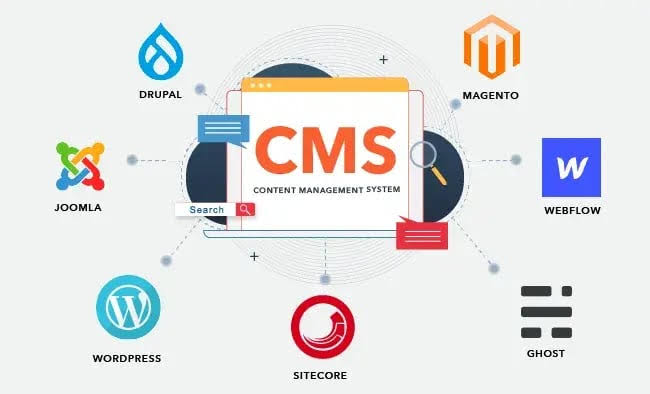
The tools can be simple. Google Docs handles collaborative drafting well. Notion or Airtable can hold briefs and assignments. Grammarly or LanguageTool can catch surface errors, but they do not replace editing judgment. A CMS such as WordPress, Webflow, or Contentful handles the final assembly. If the team is larger, a task manager like Asana, Trello, or ClickUp helps track ownership. None of those tools fixes a broken workflow by itself. They only expose it faster.
I would use this 6-step production path for a standard article:
- Brief the article. State the audience, goal, angle, target length, tone, and must-use sources.
- Build the source pack. Collect documentation, style rules, product notes, and any authoritative references before drafting.
- Approve the outline. Confirm the section order and the key point of each section before full drafting starts.
- Draft the article. Write the content in one flow and leave rough spots for the editing pass.
- Review and edit. Separate structural editing from copyediting and fact checks.
- Prepare for publication. Format headings, links, metadata, images, and calls to action in the CMS.
The real cost of production is not just writing time. It is the time lost to clarifications, rewrites, late comments, missing sources, and formatting cleanup. If a 1,200-word article keeps needing five correction rounds, the issue is usually upstream. The brief was weak, the outline was thin, or the approval path was unclear.
There is a trade-off here that many guides avoid: a clean production system can feel slower at first. It often is. But it reduces the hidden time drain that comes from untracked rework. If you are producing a steady stream of articles, that trade usually pays back quickly. If you only publish occasionally, I would keep the system lighter and avoid over-engineering the process.
Quick check: if people keep asking for “just one more quick change,” your production system does not yet have strong enough handoffs.
What Does a Good Drafting Workflow Look Like in Practice?
A good drafting workflow moves from ugly but complete to clear and credible, not from blank page to perfect prose. If you wait to write until every sentence is elegant, you will stall. If you sprint through without structure, you will create a mess that takes twice as long to fix.
I would draft articles in layers. First comes the skeleton: headings, key points, and the main argument. Then comes the meat: examples, trade-offs, steps, and transitions. Then comes the cleanup: style, grammar, repetition, and formatting. That order matters because it prevents you from polishing a paragraph that may later disappear.
If you are writing about article workflow and production, the draft should include concrete operational choices. It should say which tools fit a small team, where a checklist helps, and what to do when a subject-matter expert becomes the bottleneck. It should not just say “be organized.” That phrase is empty until you attach it to an action.
Here is the drafting sequence I would use:
- Write the intro last if needed. Draft the body first so the opening reflects the real argument.
- Use headings as checkpoints. Each heading should answer a specific question the reader has.
- Draft one section at a time. Do not jump around unless a source gap forces it.
- Insert specifics early. Mention tools, standards, time frames, or document types where they matter.
- Mark uncertain claims. Leave a note where verification is needed instead of guessing.
- Leave the polish for later. First draft, second draft, final draft are different jobs.
The best drafting tools are usually the boring ones. Google Docs is still a strong default because it supports comments, suggestions, and easy collaboration. If the team needs structured content blocks and status tracking, Notion or Airtable can help before the draft reaches the CMS. For final publication, WordPress remains common because it can handle most article formats without friction.
What this workflow is not for: it is not for teams that want every article to be a campaign asset with heavy design, multiple stakeholder rounds, and bespoke legal sign-off. In that case, the drafting workflow needs to sit inside a broader content operations process. A simple blog drafting system will collapse under that weight.
Quick check: if your first draft already reads like final copy, you are probably editing too early and slowing yourself down.
When the Standard Advice Is Wrong
The standard advice is wrong when the article is constrained by time, regulation, or a messy approval chain. If a guide tells you to “research thoroughly” without mentioning deadlines, it is not helping you. Real production always lives inside limits.
If you have a 24-hour turnaround, then breadth matters less than accuracy and structure. Pick the one angle the article must own and skip anything that does not support it. If you have a 2-week timeline and a subject-matter expert available, then you can afford a more thorough source pack and a cleaner review cycle.
If the topic is software, the standard advice also breaks when product details are in motion. Features change, names change, and integrations appear or disappear. In that case, the workflow must include a final product check close to publication. That does not mean redoing the whole article. It means confirming the claims still match the current docs, release notes, or support pages.
If the article is meant to drive search traffic, then structure matters more than poetic writing. Clear headings, direct answers, and concrete examples do more work than clever phrasing. If the article is meant to support sales, then alignment with the product’s positioning matters more than broad educational coverage.
If you need a more careful workflow, use this path:
- Lock the purpose. Decide whether the article is meant to inform, compare, convert, or support.
- Set the risk level. Low-risk thought piece, medium-risk software explainer, or high-risk claim-heavy page.
- Choose the review gate. Editor only, editor plus SME, or editor plus legal or compliance.
- Define the source rule. Official docs only, selected third-party sources, or mixed sources with a citation standard.
- Set the publication cutoff. Agree when the article stops changing so the work can actually ship.
One useful standard to keep in mind is WCAG 2.2 if accessibility matters, especially for headings, contrast, and readable structure in the published page. I would also pay attention to a style guide such as AP style or an internal editorial standard, because inconsistency is one of the fastest ways to make an article feel amateur.
Quick check: if your current process assumes stable facts, unlimited time, and one reviewer, it is built for a world that does not exist.
What Should I Do When Review Slows Everything Down?
You should remove ambiguity before review starts, because review slows down most when commenters are asked to solve problems that belong in the brief or outline. If reviewers keep rewriting the article instead of approving it, the process is broken upstream.
The fix is not “ask for fewer opinions” in the abstract. The fix is to give each reviewer a narrow job. An editor checks clarity and structure. A subject-matter expert checks accuracy. A legal reviewer checks claims. A marketing lead checks alignment with the brief. If one person is expected to judge all four dimensions, the feedback will sprawl.
A review workflow that actually works usually has a 24-hour or 48-hour window per round, a named owner, and a rule for what counts as approval. If the article cannot ship until everyone responds, the schedule becomes hostage to the slowest calendar.
Try this review sequence:
- Pre-screen the draft. Fix obvious issues before anyone else reads it.
- Send one specific question with the draft. Example: “Is the article accurate and positioned correctly for the intended reader?”
- Collect comments in one place. Use the doc or task system, not scattered messages.
- Resolve conflicts once. If two reviewers disagree, the owner makes the call.
- Close the round. Do not reopen the whole article for new ideas after approval.
The trade-off is obvious: faster review means less room for perfection. But endless review is not quality; it is indecision. I would rather have one clean approval from a person with authority than four rounds of “small edits” that keep moving the target.
If you are using Google Docs, Suggestions mode is usually enough for most articles. If you are working in a CMS with workflow states, lock the article after final approval so accidental changes do not slip in. Tools like Asana, ClickUp, or Monday can keep review deadlines visible, but they do not enforce discipline by themselves.
Quick check: if comments are repeating the same issue across drafts, the review process is catching the symptom, not the cause.
Edge Cases: When the Normal Workflow Breaks Down
The normal workflow breaks down when the article has unusual constraints, and that is where a lot of bad content operations fall apart. If you do not plan for edge cases, they will plan for you.
Here are the situations that change the process:
-
Situation: A subject-matter expert is hard to reach.
What changes: The draft cannot wait for perfect input.
What to do instead: Write from verified sources first, list the exact questions that need expert confirmation, and keep the SME review short and targeted. -
Situation: The article must ship in less than 24 hours.
What changes: You cannot afford a full research cycle.
What to do instead: Use a tighter angle, limit the number of claims, and prioritize structure and accuracy over breadth. -
Situation: Product information changes often.
What changes: Static copy becomes stale fast.
What to do instead: Tie the workflow to current docs, release notes, or a product-marketing owner who can confirm the latest details before publication. -
Situation: The article needs input from marketing, product, and legal.
What changes: Review becomes a coordination problem.
What to do instead: Give one person final decision rights and set a deadline for each reviewer. -
Situation: The article is being repurposed from a webinar, podcast, or sales deck.
What changes: The original material is not yet article-shaped.
What to do instead: Rebuild the outline from the reader’s question, not from the source material’s order. -
Situation: The content team is brand new.
What changes: There is no shared process yet.
What to do instead: Start with a lightweight checklist, one template brief, and a simple approval chain before introducing more tooling.
A normal workflow assumes the brief is clear, the facts are stable, and the reviewers are available. Those assumptions fail often enough that I would plan for exceptions from the start. A 2-step process can work in one setting and collapse in another. The answer is not complexity for its own sake; it is matching the process to the risk.
Quick check: if the article fails most often in the same unusual scenario, build a separate path for that scenario instead of forcing the main workflow to absorb it.
What Tools Help Most, and What Do They Not Fix?
The best tools are the ones that reduce handoff friction, not the ones that promise to “streamline content” in a vague way. If your brief lives in one app, your draft in another, and approvals in email, the workflow will leak time. If you centralize the process too much, you can also create bottlenecks. The point is coordination, not tool collection.
For drafting, Google Docs remains the easiest choice for most article teams because comments, suggestions, and version history are built in. For planning and assignments, Notion or Airtable can keep briefs, status, and owners visible. For task management, Asana, Trello, ClickUp, or Monday can work if the team actually uses them. For CMS publishing, WordPress, Webflow, and Contentful are common options, each with different levels of flexibility.
The trade-off between tools is practical, not ideological. Google Docs is fast and familiar, but it can get messy if the team treats it like a filing cabinet. Airtable is excellent for structured planning, but it is not where you want to draft long copy. WordPress is flexible for publishing, but a cluttered CMS setup can slow the final stage.
Use tools like this:
- Briefing tool: Notion or Airtable for a repeatable brief structure.
- Drafting tool: Google Docs for collaborative writing and comments.
- Task tool: Asana, Trello, ClickUp, or Monday for deadlines and ownership.
- Editing tool: Manual review first, then Grammarly or LanguageTool for surface cleanup.
- Publishing tool: WordPress, Webflow, or Contentful for final formatting and release.
What tools do not fix is a vague brief, a weak outline, or a reviewer who changes strategy halfway through. A team can own the fanciest platform and still produce weak articles if no one agrees on what the article is supposed to do. Software helps when the process already exists. It does not create the process for you.
If you are choosing one thing to improve first, I would choose the brief. A sharper brief does more to improve article production than a new app ever will. That is especially true for software content, where wrong claims are easier to spot and harder to excuse.
Quick check: if your process depends on people remembering instructions from memory, the tools are not the problem yet.
FAQ: Article Writing Workflow & Production
A good workflow is the shortest path from brief to publishable article without losing accuracy or direction. If you still have practical questions at this point, these are the ones I would expect to come up most often.
How many steps should an article workflow have?
Five to seven steps is usually enough for most articles. If the process has fewer than five, important checks may be missing; if it has many more than seven, the workflow may be overcomplicated for the risk involved.
Should I research before outlining or outline before researching?
I would do both, but not in equal depth. Start with quick research to understand the topic and the angle, then outline, then return to research for the missing pieces. That keeps you from collecting sources without a direction.
What is the biggest cause of slow article production?
The biggest cause is usually unclear ownership, not writing speed. When people do not know who approves what, articles sit waiting for comments or get revised in circles.
Do I need a separate editor for every article?
Not always. For low-risk, short-form content, a writer can self-edit with a checklist. For claims-heavy or high-visibility pieces, a second set of eyes is worth the extra time.
What should I fix first if an article feels weak?
Fix the structure first. If the sections are in the wrong order or the article answers the wrong question, sentence-level editing will not save it.
Is there a standard for article formatting?
There is no single universal standard, but an internal style guide plus a consistent heading structure goes a long way. For accessibility and readability, I would also keep headings clear and avoid hiding key points in dense paragraphs.
If I had to leave you with one practical rule, it would be this: build your article workflow around the hardest part of the job, not the easiest. If the hard part is accuracy, add verification. If it is speed, add templates. If it is approvals, assign one owner. That is how article production stays useful instead of becoming another pile of steps nobody follows.
Drafted with AI; not yet reviewed by a person.